

CLEAR ACRYLIC PRINTING
Reverse UV printing changes one simple thing that affects the entire job: the customer looks through the acrylic before seeing the printed image.
Instead of placing the finished graphic on the front surface, the printer places the artwork on the back of a transparent acrylic sheet. The clear material then becomes part of the finished appearance and can protect the printed surface from direct handling.
That sounds simple, but it changes the artwork orientation, ink order and white-ink plan. A file prepared for normal front-surface printing should not automatically be reused for reverse printing without checking how the finished piece will be viewed.
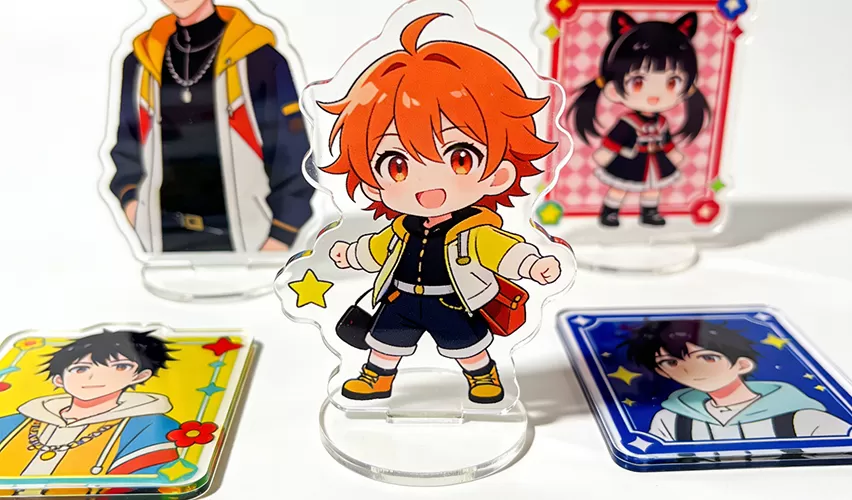
Clear acrylic products can use transparency as part of the design. The viewing side, printed side and white-ink coverage should be planned before the job is sent to the printer.
Before preparing layers, decide which face of the acrylic the customer will look at. This single decision determines whether the artwork needs to be reversed and whether white ink is printed before or after the color layer.
For a conventional front-surface print, the customer looks directly at the printed surface. For a second-surface or reverse print, the printer prints on the back and the customer views the design through the acrylic.
FRONT-SURFACE PRINT
The image is normally prepared in its usual reading direction. When an opaque white backing is needed behind the color, the white layer is positioned according to the printer and RIP workflow for front viewing.
REVERSE / SECOND-SURFACE PRINT
The artwork usually needs to be mirrored so that text and graphics read correctly from the front. The color is printed against the acrylic, with the white backing placed behind it according to the validated layer sequence.
Why the viewing direction matters: Roland's technical guidance for printing white on transparent media specifically distinguishes between viewing from the printed surface and viewing from the opposite side. Its Production Manager documentation also explains that a CMYK-then-white sequence can be used for second-surface viewing. See Roland's white-ink layer-order guidance . The menu names and profiles are Roland-specific; use the MEST software instructions for the actual machine.
One of the easiest ways to ruin a reverse acrylic job is to mirror the artwork twice. A designer may flip the file manually, and then the RIP software may apply another mirror function during output. The result looks correct on the printed side but backwards when viewed through the acrylic.
Decide where the mirror operation will happen and make that part of the production procedure. Before printing a full sheet, use a small proof containing readable text, a directional arrow and the actual logo orientation.
Add a temporary line of text such as VIEW FROM FRONT to the proof file.
Place the acrylic in the intended printing orientation.
After printing, turn the sample to the customer's viewing side. If the text reads correctly there, the orientation is correct. Remove the temporary test element before production.
On clear acrylic, color ink alone allows light and the background behind the finished product to influence the image. A white layer can create an opaque backing so photographs, logos and saturated colors remain more visually consistent.
But the correct white coverage depends on the design. A full white rectangle behind the artwork may destroy areas that were intentionally meant to stay transparent. White ink should therefore be treated as its own design layer rather than generated without reviewing the final appearance.
MEST's current 6090 documentation lists white ink as one of the available ink-channel options and specifically notes its use as an opaque backing on transparent materials. Confirm the installed channel configuration and supported printing sequence before preparing the production file.
| Design Area | White Ink Planning | What to Check |
|---|---|---|
| Full-color photo | An opaque white backing may be useful behind most or all of the image. | Compare color density with the real background behind the final product. |
| Transparent window | Leave white out of the intended clear area. | Check that the white plate does not accidentally close the transparent window. |
| Fine text or logo | Match the white shape carefully to the color artwork. | Look for white halos caused by registration or oversized white artwork. |
| Intentional translucent color | White may be omitted or selectively reduced, depending on the intended effect. | Approve the sample against the lighting and background where the product will be displayed. |
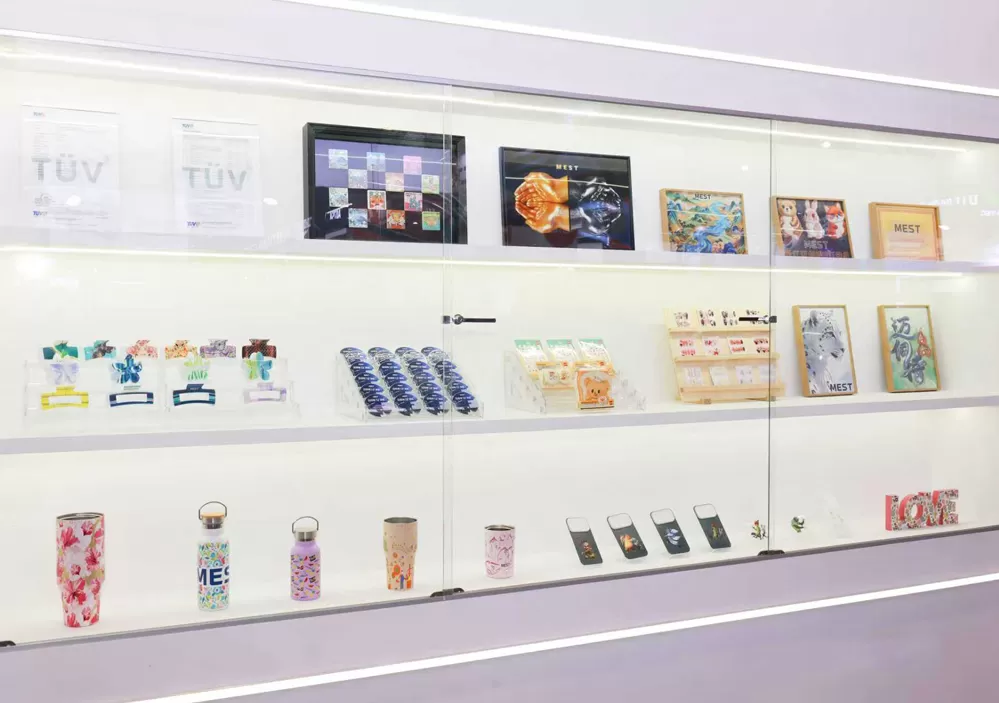
Acrylic pieces in MEST's printed-product display. Transparent products can combine opaque printed areas with intentionally clear areas, so white ink coverage should follow the artwork rather than simply cover the entire sheet.
Layer order becomes easier to understand if you stop thinking about which ink leaves the printhead first and instead imagine the finished product from the customer's side.
TYPICAL REVERSE-PRINT CONCEPT
Customer
Clear Acrylic
Mirrored CMYK
White Backing
Printed Back
This is a conceptual stack, not a universal printer setting. The actual sequence depends on the RIP software, ink-channel configuration and how the printer defines layer order.
Mimaki's acrylic application guidance provides a practical example: reverse-side artwork is prepared as inverted data and printed with color and white layers in an order intended for viewing through the transparent sheet. See Mimaki's acrylic reverse-print application example. Its workflow is specific to Mimaki equipment, but the viewing-side principle applies when planning any second-surface job.
Transparent acrylic designs often use the clear sheet itself as part of the artwork. A clear border around a character, a window inside a logo or an unprinted background can be intentional design elements.
That means the production file needs more than a color image. The operator needs to know exactly where white ink is required and where both white and color must remain absent.
Should this area be fully opaque? If yes, confirm the required white backing on the sample.
Should this area remain visibly transparent? If yes, make sure the white plate does not extend into it.
Should the color itself look translucent? If yes, approve that effect under the actual display background and lighting.
A slight mismatch between color and white ink may be difficult to notice on an opaque board but very obvious on transparent acrylic. The viewer can see a white edge or halo around text, logos and illustrated characters.
This is especially important with fine outlines and small typography. Avoid automatically enlarging the white plate without reviewing the result. Any choke or spread setting should be validated using the actual machine, RIP and artwork.
Look for a white edge around small lettering when viewed from the finished side.
Inspect character outlines, logos and isolated graphic elements against both light and dark backgrounds.
A retail display, acrylic stand and close-view photo block may require different visual acceptance criteria.
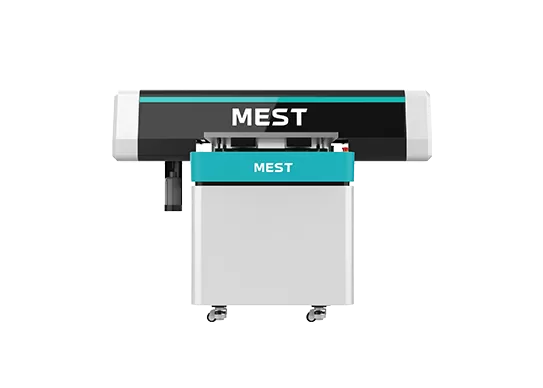
MEST-6090 UV flatbed printer. White ink and other channels depend on the selected configuration, so confirm the actual machine setup before preparing a multilayer acrylic job.
PRACTICAL EXAMPLE
Imagine a clear acrylic character stand with a full-color figure, a small logo and a transparent border around the outside.
First, define the finished viewing side. If the customer will look through the acrylic, prepare the artwork for second-surface printing and confirm where the mirror operation happens.
Next, separate the white backing. The character and logo may need opaque white behind the color, while the outer clear border should remain unprinted.
Then print a small proof. Check reading direction, white registration, color appearance and transparent areas from the customer's side.
Only after approval should the full layout be produced. Keep the accepted artwork version and printing settings with the sample so the next production run can be compared against it.
A reverse print should not be approved by looking only at the printed back. Turn the acrylic around and evaluate it exactly as the customer will see it.
Reading direction: text and logos appear correctly from the viewing side.
White registration: no unacceptable white halo is visible around the color artwork.
Transparency: intended clear areas remain clean and visually consistent.
Color appearance: evaluate the piece over light and dark backgrounds if the finished product may be displayed in different environments.
Surface and adhesion: verify the actual acrylic and ink combination before approving a larger production batch.
Decide which application controls the mirror function and verify the proof from the finished viewing side.
White should support the intended appearance, not automatically eliminate every transparent part of the design.
Transparent products can look different over a dark counter, wall, package or display stand. Test against realistic backgrounds.
Reverse-print principles are transferable, but RIP menus, ink modes, pass settings and layer controls are equipment-specific. Follow the instructions for the installed MEST configuration.
COMMON QUESTIONS
Usually yes when the finished graphic will be viewed through the acrylic. Confirm whether mirroring is performed in the artwork software or RIP so the image is not reversed twice.
A white backing can reduce the influence of light and the background behind the acrylic, helping the color image appear more opaque. The amount and coverage should be approved using the actual design.
Yes. Leave the intended area out of both the color and white artwork when a completely clear section is required. Confirm the result on a proof before production.
The MEST-6090 is designed for flat materials including acrylic, and its listed configurations include white ink options. Confirm the exact ink channels, acrylic thickness, artwork and required layer sequence through sample testing before ordering.
See examples and application ideas in the MEST UV printing on acrylic guide.
Compare different bed sizes in the MEST UV flatbed printer range.
Review the MEST-6090 UV flatbed printer when evaluating compact acrylic production and multilayer ink configurations.
SAMPLE BEFORE PRODUCTION
Share the acrylic dimensions and thickness, finished viewing side, artwork, transparent areas, white-ink requirements and expected production quantity. Ask MEST to confirm the proposed printing configuration and sample requirements.
Discuss My Acrylic Printing ProjectExternal technical references describe the named manufacturers' software and printing workflows. Their menu names, output profiles and layer settings are not MEST machine instructions. Confirm the actual RIP workflow, ink-channel configuration and acrylic compatibility for the printer being used.
Our engineers will provide a tailored quote and technical analysis for your production line within 24 hours.
Free Sample Printing & Testing
Factory Direct Pricing & Support
Global Fast Delivery
100% Data Privacy Protected


